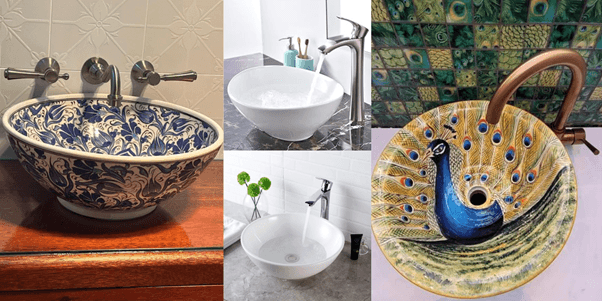
If your bathroom looks boring, then you can install a vessel sink and faucet which can give a modern as well as clean look. While the process may seem a little complicated, one can successfully carry out this operation if they have the appropriate equipment and a useful tutorial to help them. This article guides you, step by step installation, so it will become all the easier for you. Furthermore, we also explore how the Zeemceramic Vessel Sink and Bathroom Accessory Set is going to enhance the beauty of your bathroom.
Step 1: Gather Necessary Tools and Materials
Before commencing the installation, gather the following items:
· Vessel sink
· Vessel faucet
· Mounting ring (if required)
· Silicone sealant
· Adjustable wrench
· Basin wrench
· Teflon tape
· Pipe wrench
· Drill (if creating new holes)
· Plumber's putty
These tools need to be ready, otherwise the process remains interrupted.
Step 2: Prepare the Countertop
· Choose the Right Location: Ensure it is sturdy and there is enough space for the sink and the faucet installation.
· Drill Holes: Mark the hole locations if not pre-drilled. Drill hole for sink and faucet – use proper techniques as per the manufacturer standards.
Step 3: Install the Faucet
· Position the Faucet: Insert the faucet in the hole that was previously drilled. Make sure that it fits well with the position of the sink.
· Secure the Faucet: With the included hardware, secure the faucet from underneath the countertop. A basin wrench might come in handy for securing the nuts in narrow spaces.
· Connect the Water Supply Lines: To the faucet connect the hot and cold-water supply pipes, and be sure you use Teflon tape on the threads for a water-tight fitting.
Step 4: Install the Vessel Sink
· Apply Silicone Sealant: Silicone sealant can be used to glue around the bottom edges of either the sink or the mounting ring.
· Position the Sink: Position the sink onto the mounting ring or rest it directly onto the countertop while making sure that it is lined up correctly with the drain hole.
· Secure the Drain Assembly: Position the drain in the sink hole and add plumber's putty to its bottom edge. From the bottom side, tighten the screws to the drain assembly making sure it is tight.
Step 5: Connect the Plumbing
· Attach Drain Pipes: Attach the P-trap to the sink drain and make sure all connections are tightly fastened
· Test for Leaks: Switch the water supply on and check the faucet and drain for any leaks. If there are any, then make sure to tighten the connections as necessary.
Step 6: Final Touches
· Seal Edges: For the purposes of reinforcement, apply silicone to the sides as well as the bottom of the sink.
· Polish the Sink: Wipe off the sink and taps to eliminate the marks of fingers and smudges.
Elevate Your Bathroom with Zeemceramic Vessel Sink and Accessories
An assemblage of Bath Accessories and a Zeemceramic Vessel Sink can complement the entire decor of the bathroom. These sinks are crafted to satisfy the needs of style and quality and are available in many designs to fit all styles. The stylish ceramic finish is not only a sign of elegance but is also easy to take care of. Together with their stylish accessory set, Zeemceramic items can add harmony and elegance to your space. One can complement the appearance of the bathroom by investing in these accessories. As a result, the bathroom looks as good as it feels.